Assembly of the laser cut railway station canopy
17 May 2026,
Introduction
The railway station platform canopy parts are crafted from laser-cut 2mm and 3mm plywood, which may result in smoke marks on the wood surface. A light sanding with fine-grit sandpaper is recommended to smooth out these marks. Dry assemble the parts before gluing, then apply a good-quality PVA wood glue.
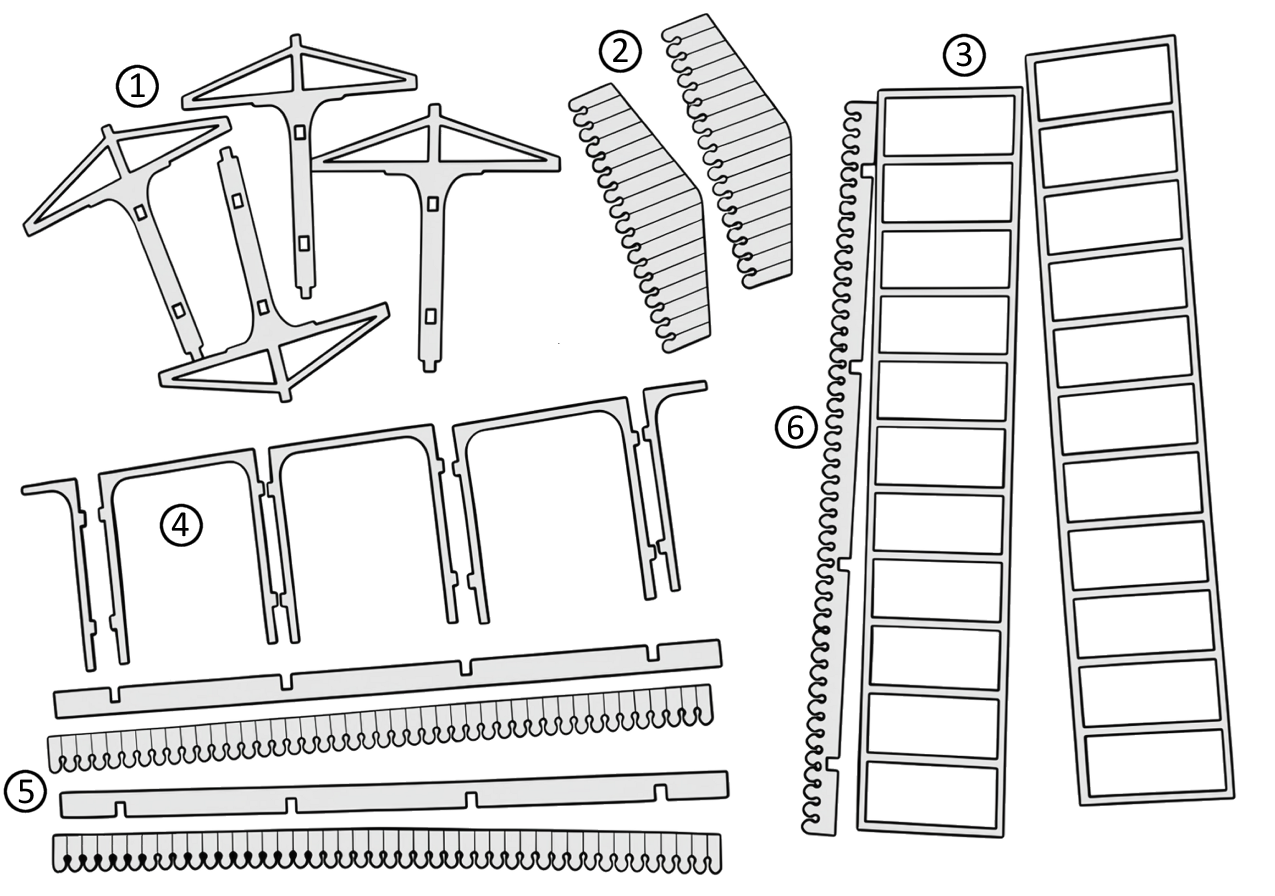 |
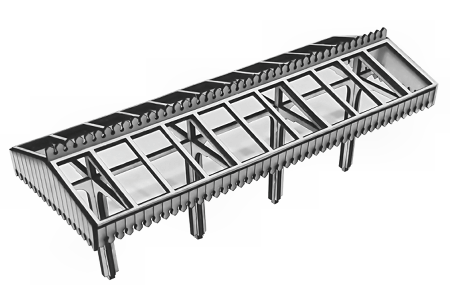
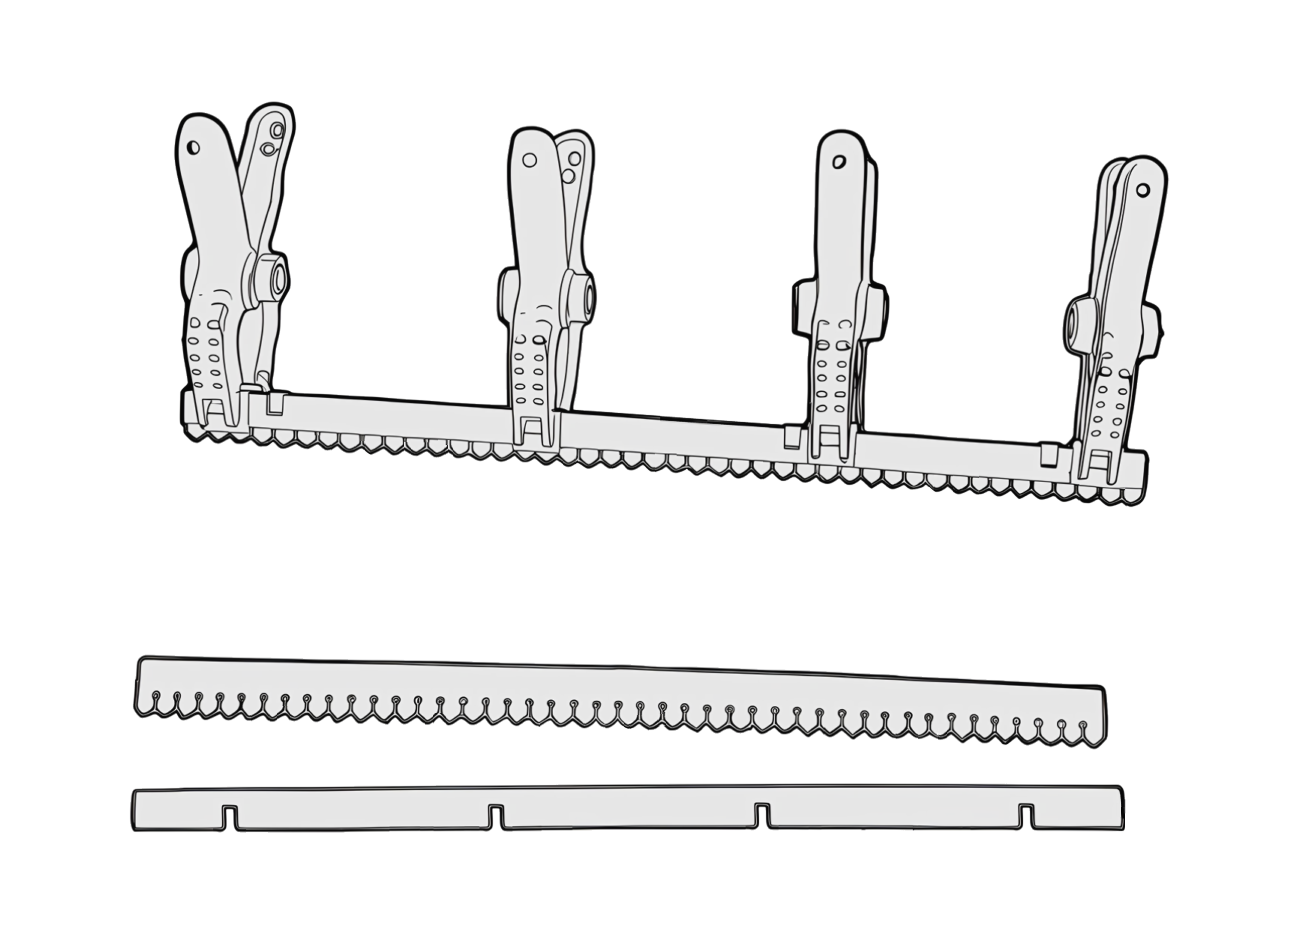
Parts Included ➀ Roof supports ➁ Valance ends ➂ Roof frame ➃ Girder supports ➄ Valance sides with supports ➅ Decorative roof ridge |
|
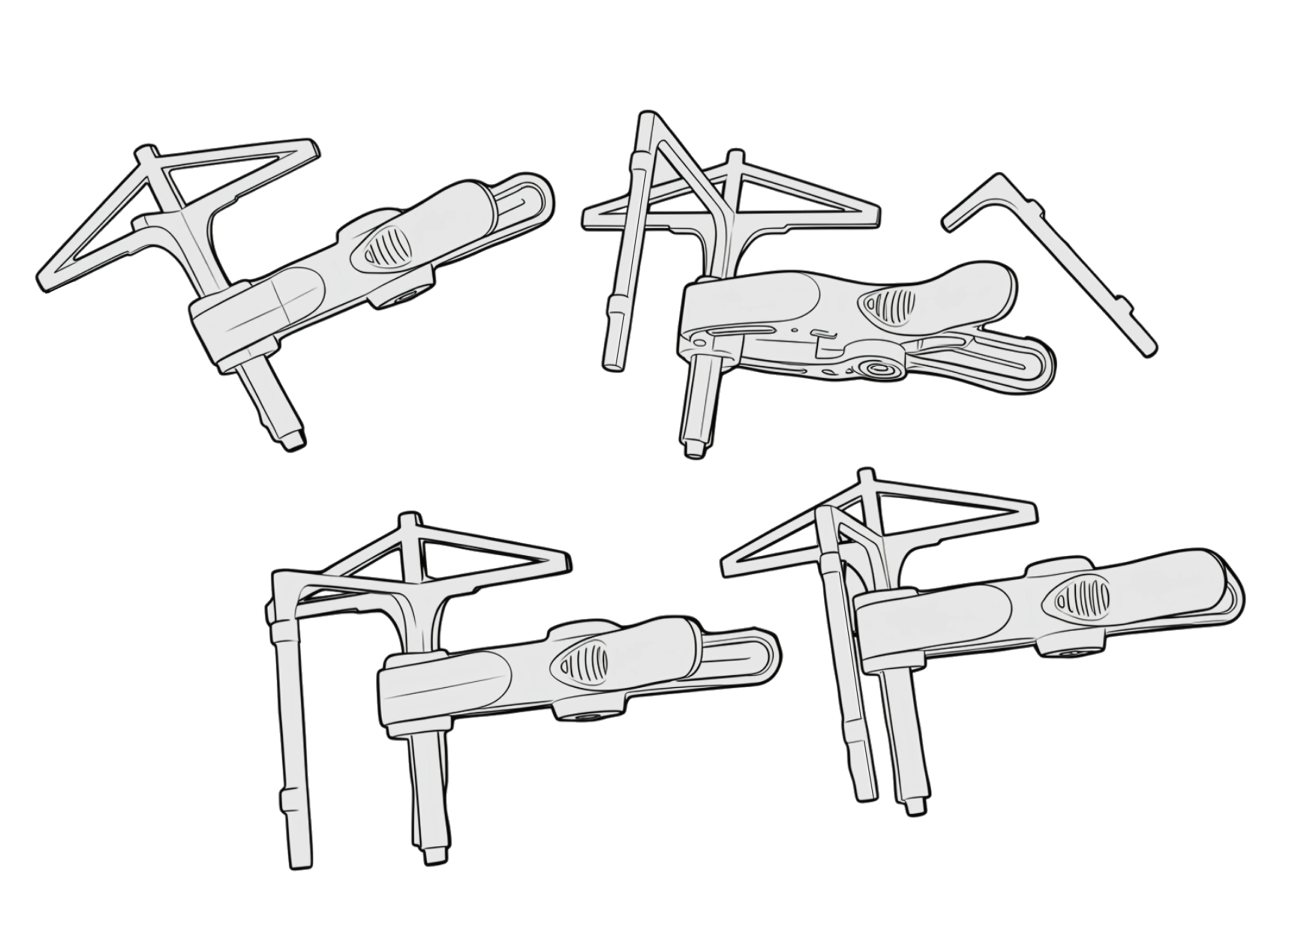 |
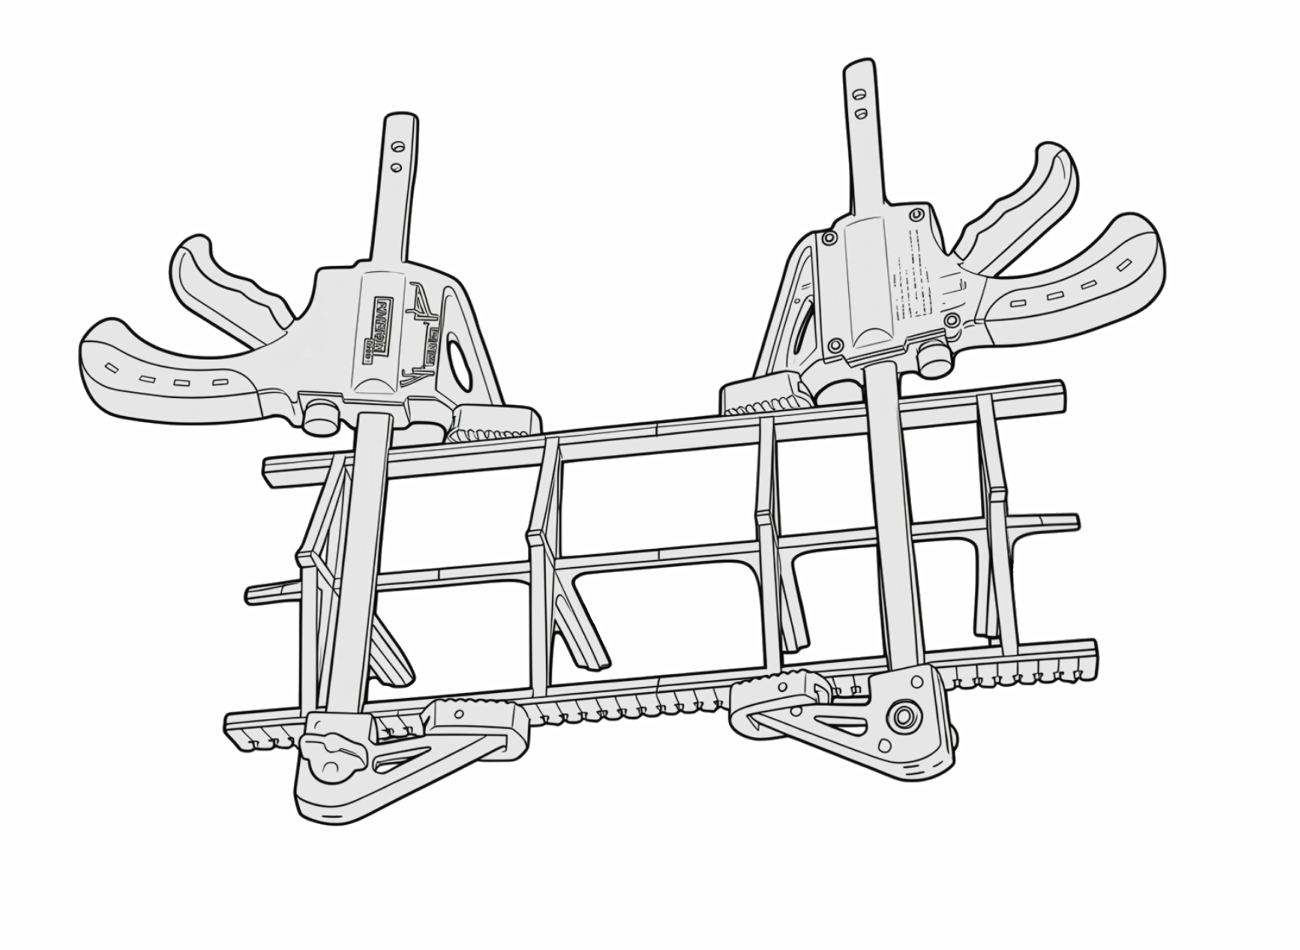
Attach the girder supports ➃ to one side of the roof supports ➀ Hold the parts in place using clamps or tape while the glue sets. |
|
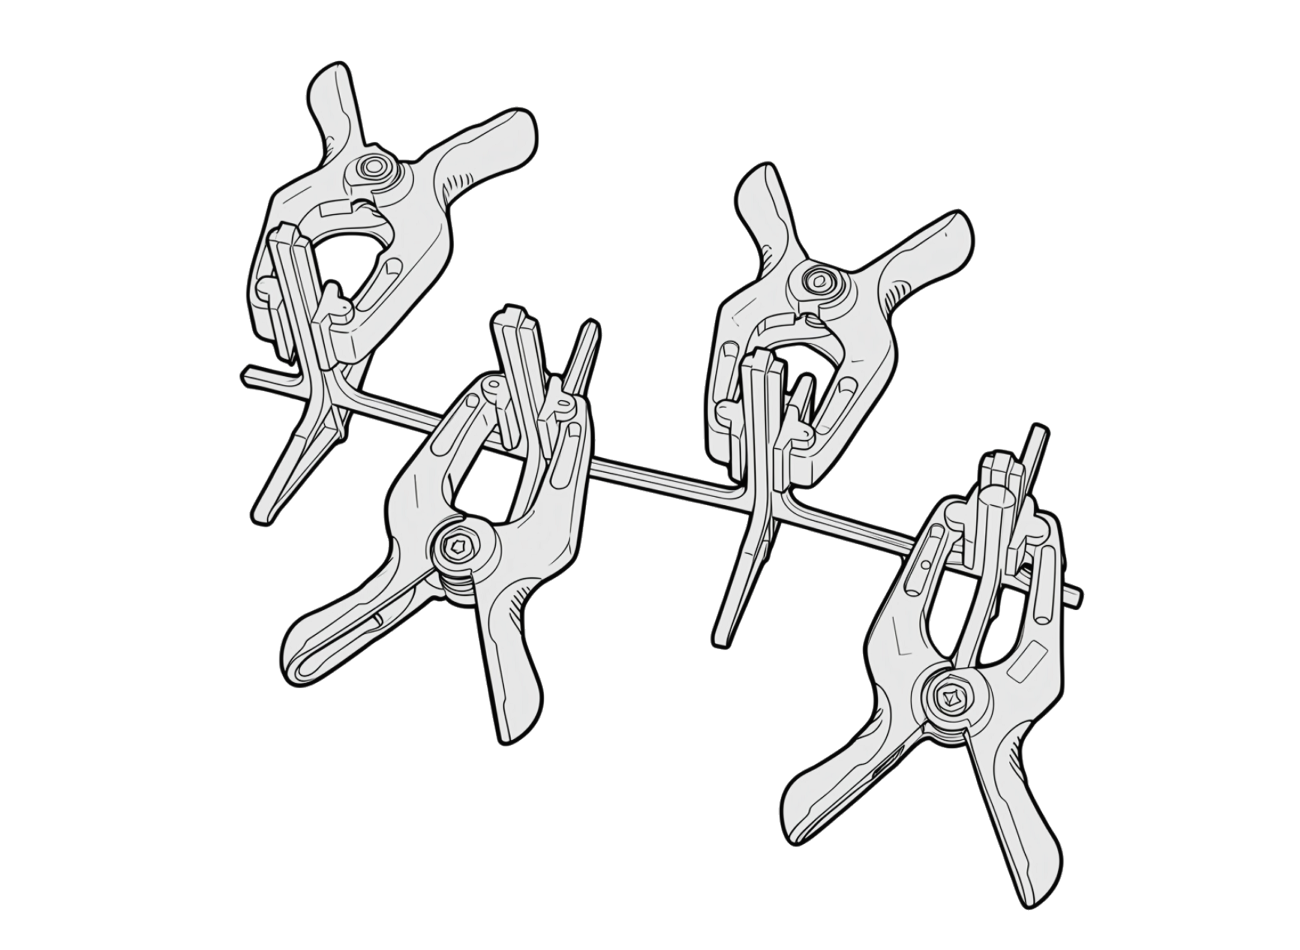 |
Attach the remaining ends of the girder supports ➃ to the opposite sides of the roof supports ➀, ensuring the shorter girder supports are positioned at both ends. Hold the parts in place using clamps or tape while the glue sets. |
|
 |
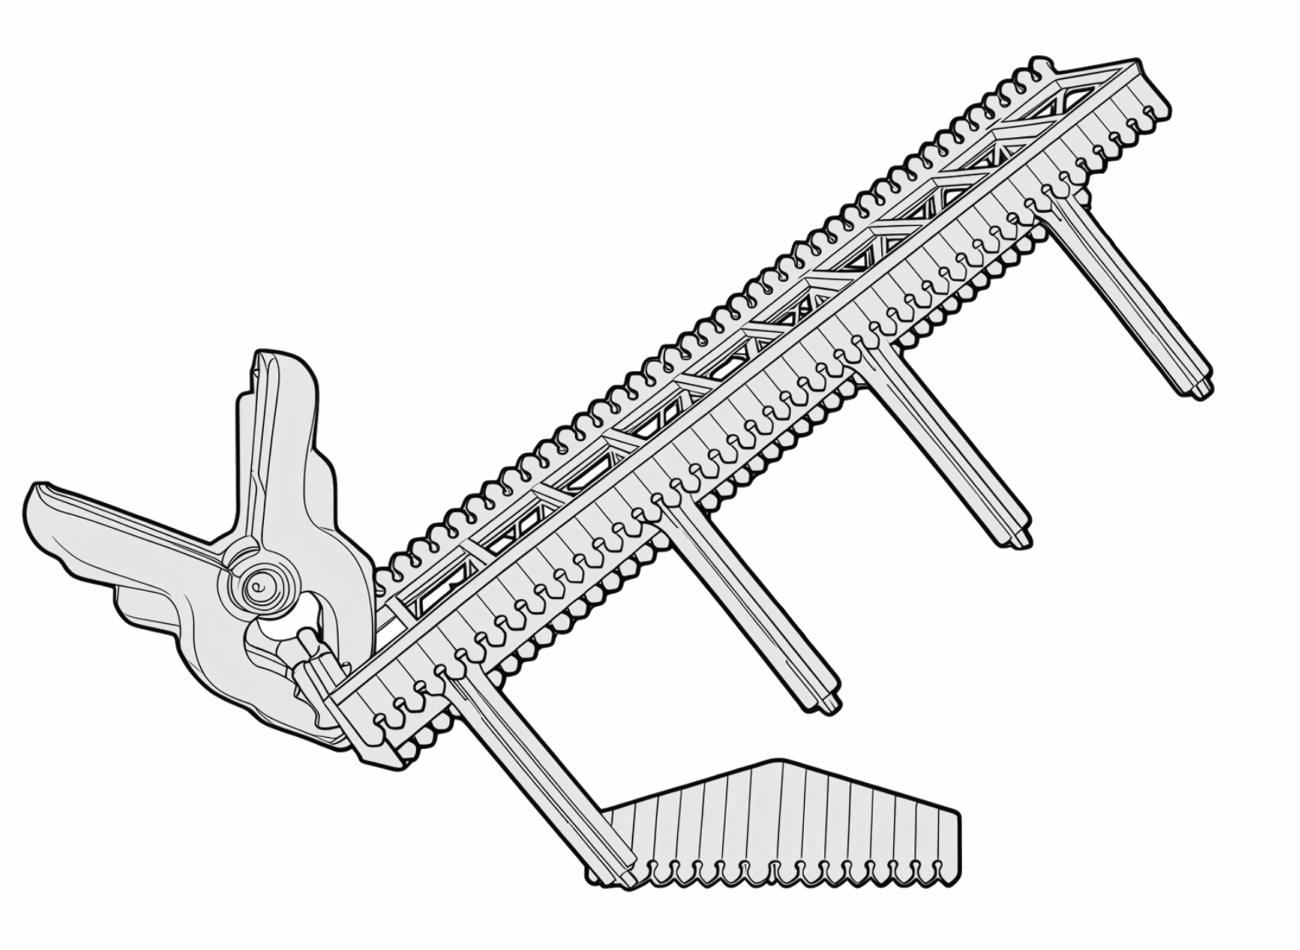
Attach the valance side supports to the valance sides ➄ ensuring the cut-outs face upwards (see illustration) Hold the parts in place using clamps or tape while the glue sets. |
|
 |
Attach the valance side supports ➄ on to the ends of the roof supports ➀ aligning with the four cut-outs. Hold the parts in place using clamps or tape while the glue sets. |
|
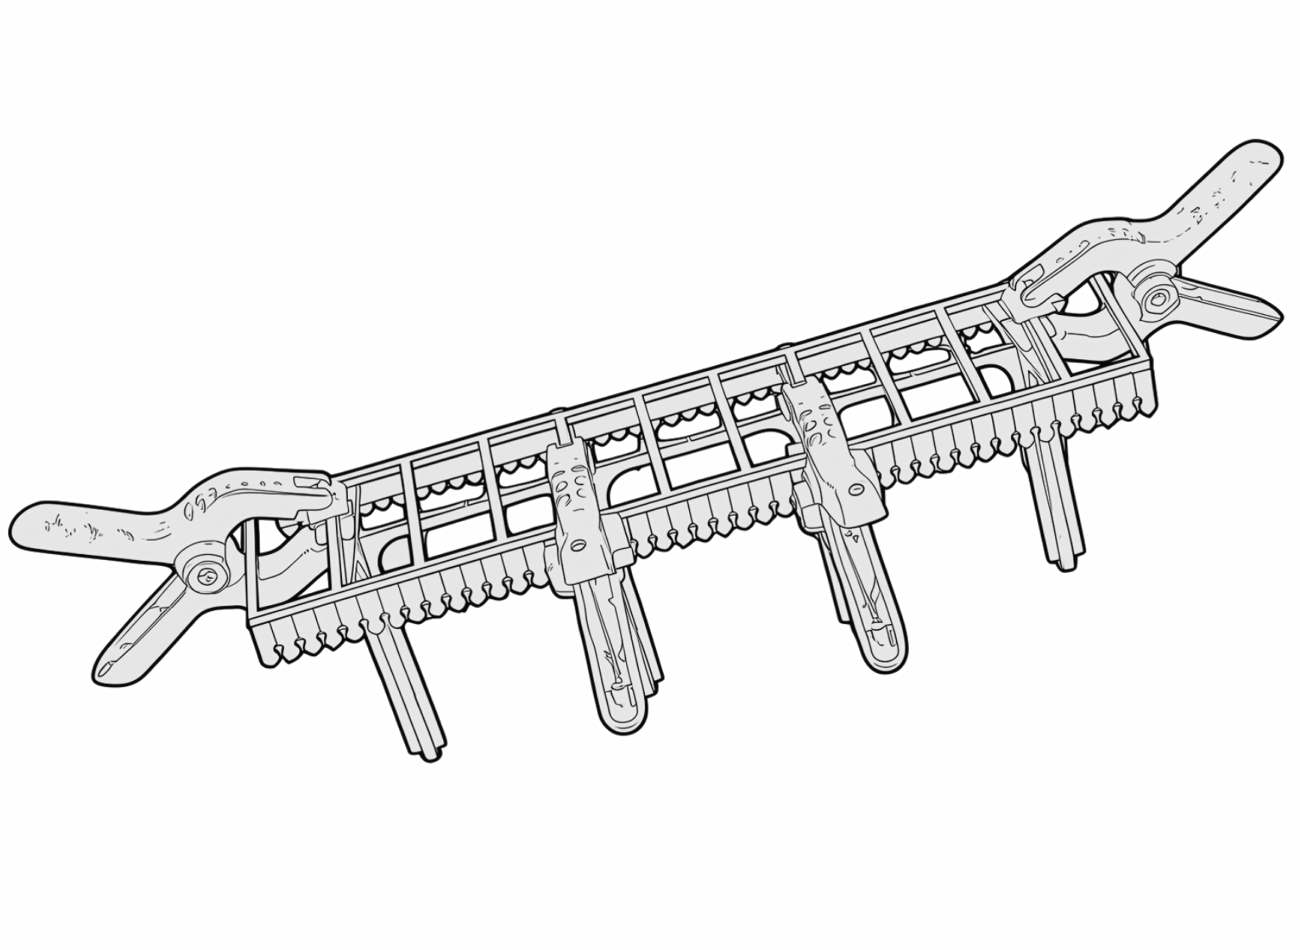 |
Attach the roof frames ➂ to the slope of the roof supports ➀ Hold the parts in place using clamps or tape while the glue sets. |
|
 |
Attach the valance ends ➁ to each side of the assembled canopy. Attach the decorative roof ridge ➅ to the top of the canopy aligning with the four cut-outs. Hold the parts in place using clamps or tape while the glue sets. Spray the completed canopy with several coats of paint, then glaze the roof using clear PVC sheeting. |
|